How To Install Dam Liners
A Step by step procedure on how to install dam liners:
To learn how to install dam liners in your water pan or tank, consider the following factors
- Determine if;
1.1. It is a water reservoir
or
1.2 A water tank
Each storage unit has a different way of calculating the dam liner
2. Define the shape of the water pan or tank;
2.1. Is it circular/ oval or square/ rectangular or irregular?
2.2 Are the rectangular/ square sides steep or slanted?
The dam liner calculation formulae is different for each shape as illustrated later in this article
The second stage in how to install dam liners is to work out the dam liner size

A Grekkon Limited technician installing a dam liner in a water reservoir
How to calculate dam liner size
I. Square / rectangular steep sloped sides
Total length in meters: (length + 2depth + 2meters). Total width in meters: (width + 2depth +2meters). The additional 2meters on each side are for the overlap which is tucked in a trench for water reservoirs. For tanks, it’ll be 0.5M. Multiplying the total length with the total width gives the pond liner area in meters

A dam liner installed by Grekkon Limited on a steep sloped water reservoir
II. Square / rectangular slanted side

Slanted sides water reservoir
III. Square/ rectangular water tanks

IV. Oval / circular shaped water reservoirs
Diameter + (2height/ depth) + (2meters)

A circular dam lined water reservoir
V. Oval / circular shaped water tanks
Diameter + (2height/ depth) + (0.5meters)
Dam liner welding is done prior to installation. To understand the welding process fully, a grower must first learn the dam liner installation process
Steps on How to Install Dam liners in Kenya
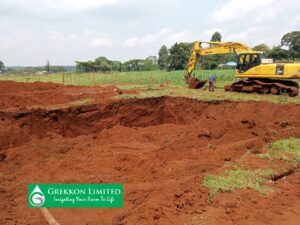
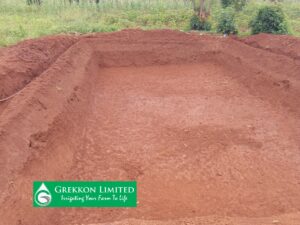
Water Pan Excavation
This is the first step and usually takes the longest time. Excavation is manual with hand-tools, or with a machine. Most common machines for dam excavation are backhoe loaders, excavators, and rollers. At excavation, the side walls are inclined at an angle to prevent collapse of the dam.
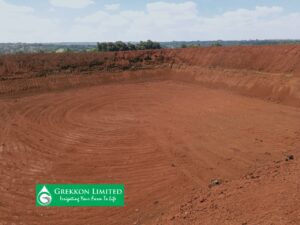
Smoothening Of The Water Pan
This is to remove any sharp objects that damage the dam liner. Pour in water on the floor and sides to soften it. A roller will hen firm up the ground leaving it smooth and flat
Before trench making, get a roller to compress the mould of soil that was excavated and is spread out roundabout the water pan
Trench Making
Trenches are dug round the water pan where the dam liner will be installed. The size of the trench will depend on the size of the resevoir and the dam liner thickness. The most popular trench sizes are 1ft deep by 1ft wide and 1.5ft deep by 1.5ft wide. The alternative to trenches is to use sand bags to hold the dam liner in place at the top of the water reservoir
Observe the trench made around the water pan. it is 1M from the edges of the water pan, and this is where the dam liner will be tucked

Welding structures the pond liner to the water pan’s or tank’s shape, so as to hold water. The welded joints must be leak free for the dam liner to work effectively in the tank or water pan. Lined water pans are popular as water storage units for agricultural field crops irrigation in a country that has just one or two rainy seasons
How to join dam liners together
Cut the desired dam liner size from a roll. When the right size is larger than a roll, join the rolls. Welding is by either a hot blower machine for 0.5mm, or with a dam liner welding machine for larger thicknesses. The sides to be welded together are overlaid during this process to give a perfect seal. This is an important stage because any gaps that cause water seepage will mess the entire water conservation effort. A specialist must carry out this job to avoid such losses
There are no comments